Keep API keys safe with .env files, let Ruff fix your code automatically, and manage projects the modern way with uv.
Part 1: Aman's Key Goes Public
Aman signs up for an AI API and gets a key. He pastes it into his code:
import requests

API_KEY = "sk-live-8f3a9c2b7e1d4f6a..."

response = requests.get(url, headers={"Authorization": f"Bearer {API_KEY}"})
It works. He is happy. He shares the file with a friend, uploads it to GitHub to show off, and goes to sleep.
Next morning, Neha sends him a message: "Your API key is on the internet. Anyone can use it. Your account will be billed for whatever they do. Revoke it now."
Aman learns the hard way: secrets never go in code.
This article covers:
- Environment variables and
.envfiles - The
python-dotenvpackage - Ruff: a linter and formatter
- Setting up Ruff in VS Code
- uv: the modern package manager
uv init,uv add,uv sync- A complete project workflow, start to finish
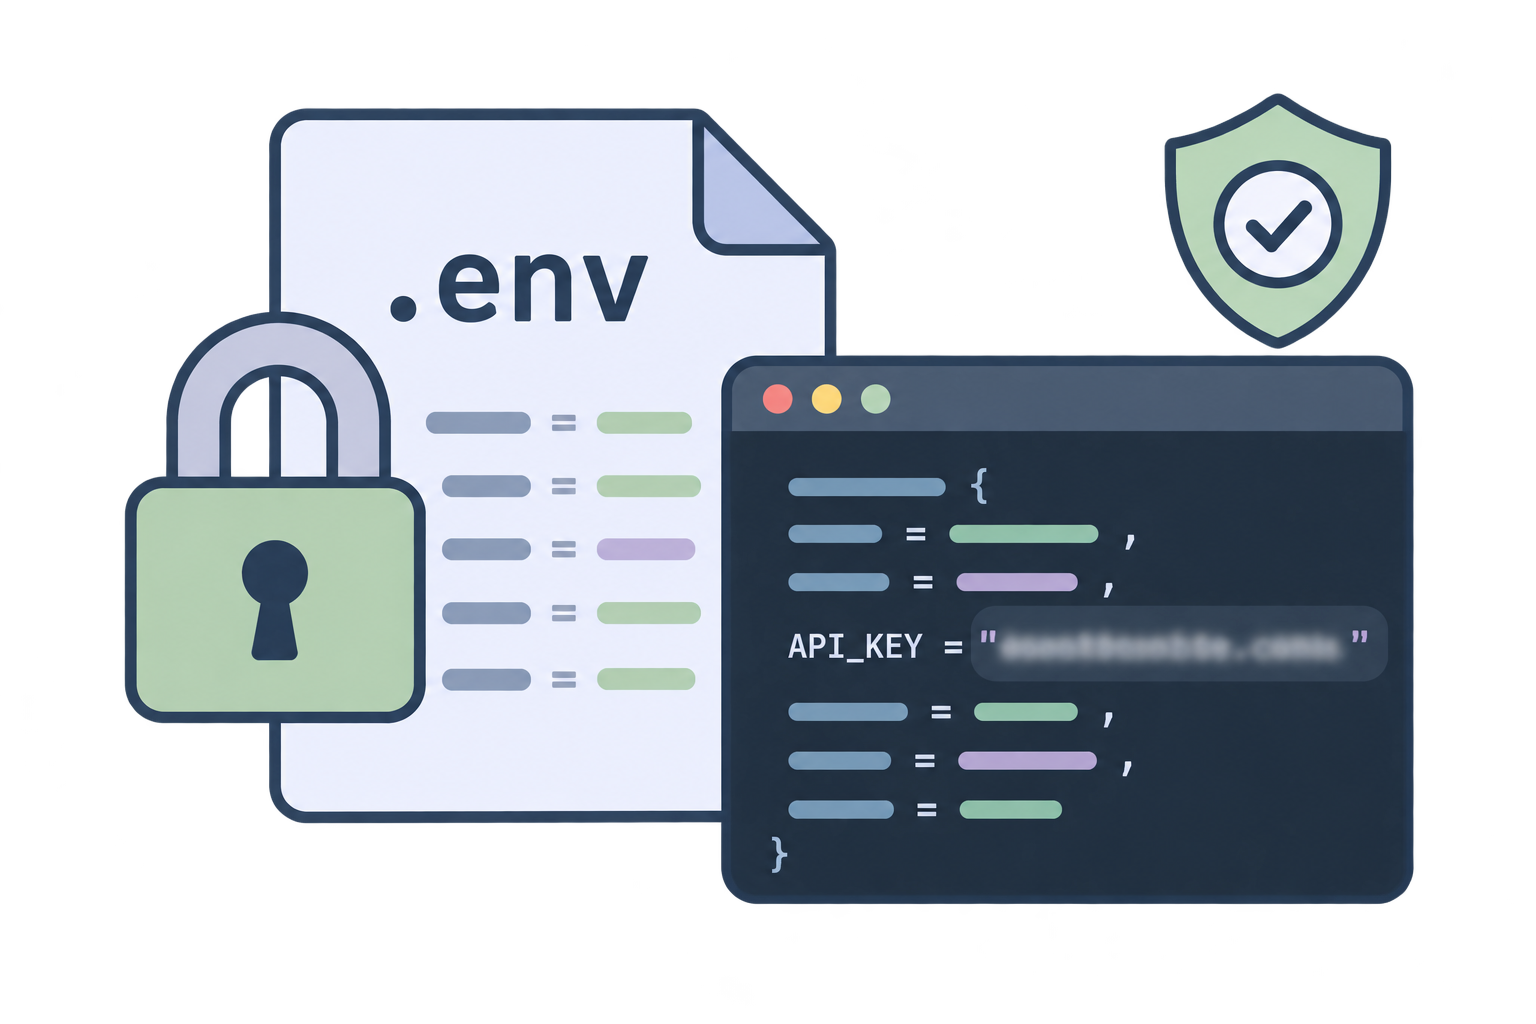
Part 2: Environment Variables and Secrets (.env)
What is a secret?
Anything that gives access to something valuable:
- API keys (OpenAI, Anthropic, weather APIs)
- Database passwords
- Tokens for GitHub, Slack, email
- Private URLs
If someone else gets it, they can act as you.
The rule
Code is public. Secrets are private. Keep them in different places.
What is an environment variable?
An environment variable is a value stored by the operating system, outside your code. Programs can read it, but it is not inside any file you share.
You can set one in the terminal:
Mac/Linux:
export API_KEY="sk-live-8f3a..."
Windows (PowerShell):
$env:API_KEY = "sk-live-8f3a..."
And read it in Python:
import os

api_key = os.getenv("API_KEY")
print(api_key)
Now the key is not in the code. But typing export every time you open a terminal is annoying. That is where .env files help.
The .env file
A .env file is a plain text file in your project root with KEY=value lines:
API_KEY=sk-live-8f3a9c2b7e1d4f6a
DATABASE_URL=postgres://user:pass@localhost/db
DEBUG=true
Rules:
- No spaces around
= - No quotes needed (but allowed)
- One secret per line
- Lines starting with
#are comments
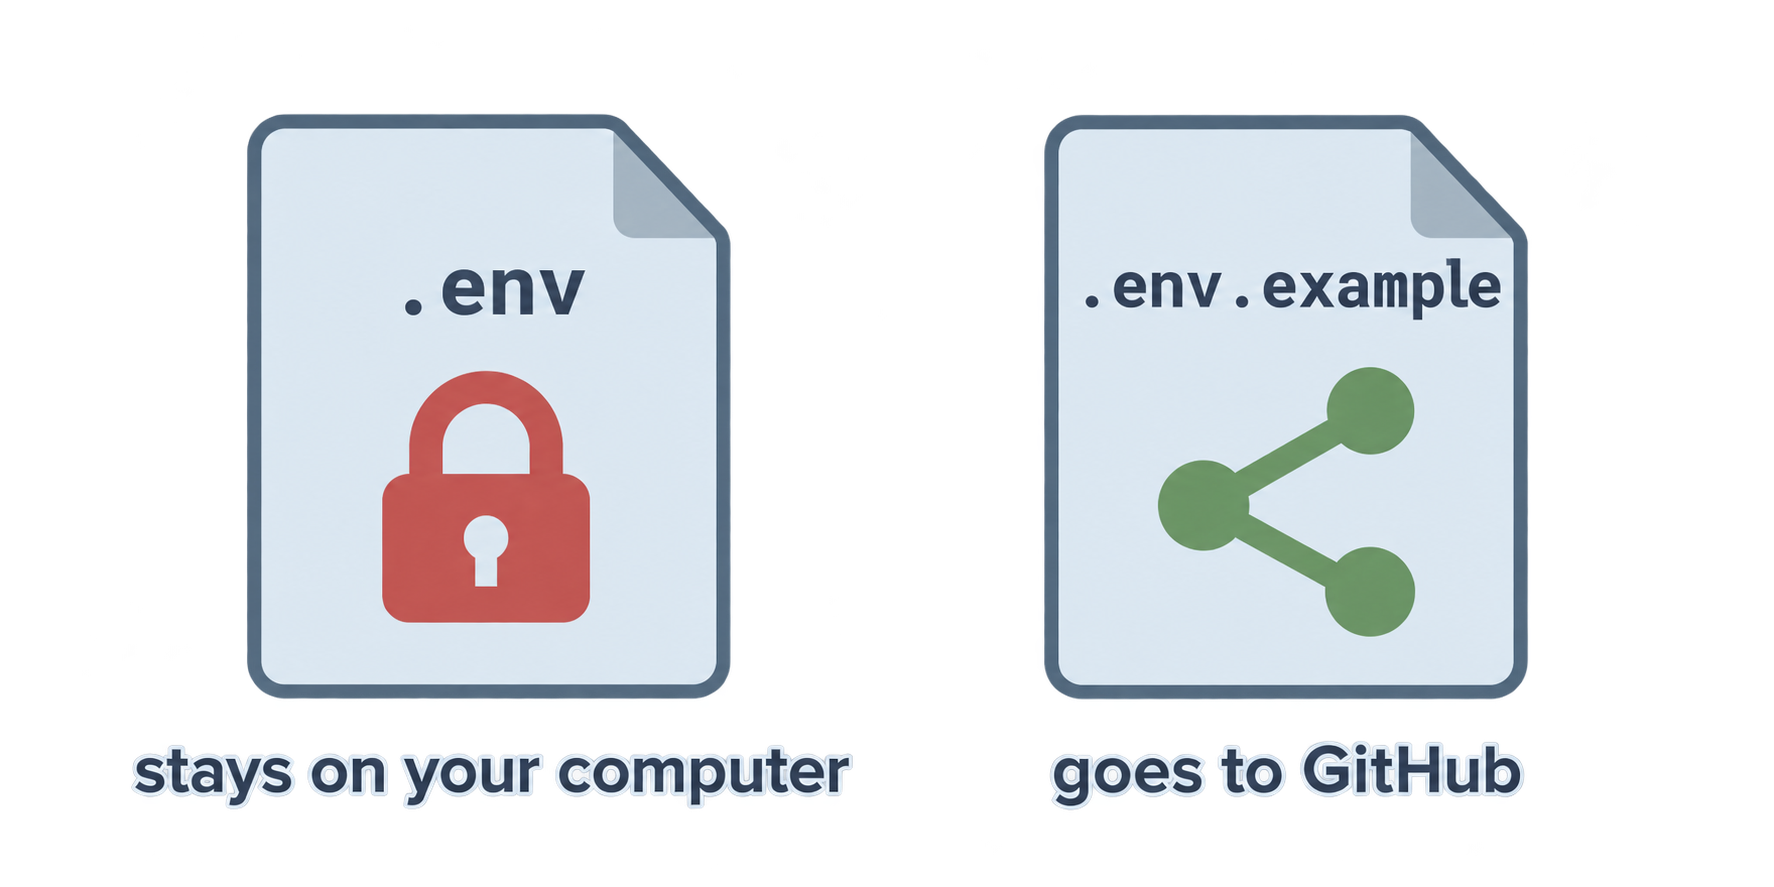
Never share .env
Add it to .gitignore so Git never uploads it:
# .gitignore
.env
.venv/
__pycache__/
If .gitignore already exists in your project, just add the line .env.
Share a template instead
Create .env.example with the names but no real values:
API_KEY=your_key_here
DATABASE_URL=your_database_url
DEBUG=false
This file is committed. Anyone who clones your project knows which secrets they need to fill in.
Practice
- Create a
.envfile with a fake keyAPI_KEY=test123. - Add
.envto.gitignore. - Why do we create a
.env.examplefile? - What is wrong with
API_KEY = "sk-..."insidemain.py?
Part 3: Using the python-dotenv Package
Python does not read .env files by itself. The python-dotenv package does it for you.
Install
pip install python-dotenv
Use
from dotenv import load_dotenv
import os

load_dotenv()   # reads .env and puts the values into environment variables

api_key = os.getenv("API_KEY")
That is all. load_dotenv() looks for a .env file, reads each line, and makes it available to os.getenv().
Fail loudly if a key is missing
os.getenv() returns None if the key is not found. That can cause confusing errors later. Better to check right away:
api_key = os.getenv("API_KEY")

if not api_key:
    raise ValueError("API_KEY is missing. Add it to your .env file.")
Or use os.environ[], which raises a KeyError automatically:
api_key = os.environ["API_KEY"]
A clean pattern: config.py
Put all secret loading in one place:
# src/config.py
import os
from pathlib import Path
from dotenv import load_dotenv

BASE_DIR = Path(__file__).parent.parent
DATA_DIR = BASE_DIR / "data"

load_dotenv(BASE_DIR / ".env")

API_KEY = os.environ["API_KEY"]
DEBUG = os.getenv("DEBUG", "false").lower() == "true"
Then everywhere else:
from config import API_KEY
Note the second argument of os.getenv("DEBUG", "false"): that is a default value used when the key is missing.
Where .env should live
load_dotenv() searches from the current working directory upwards. Passing the path explicitly (as above) is safer, for the same reason file paths were a problem in the last article.
Practice
- Install
python-dotenv, create.envwithNAME=Aman, and print it from Python. - What does
os.getenv("MISSING_KEY")return? - What is the difference between
os.getenv("X")andos.environ["X"]? - Write a line that reads
PORTfrom.envwith a default of8000, converted to an integer.
Part 4: Introduction to Ruff (Linter and Formatter)
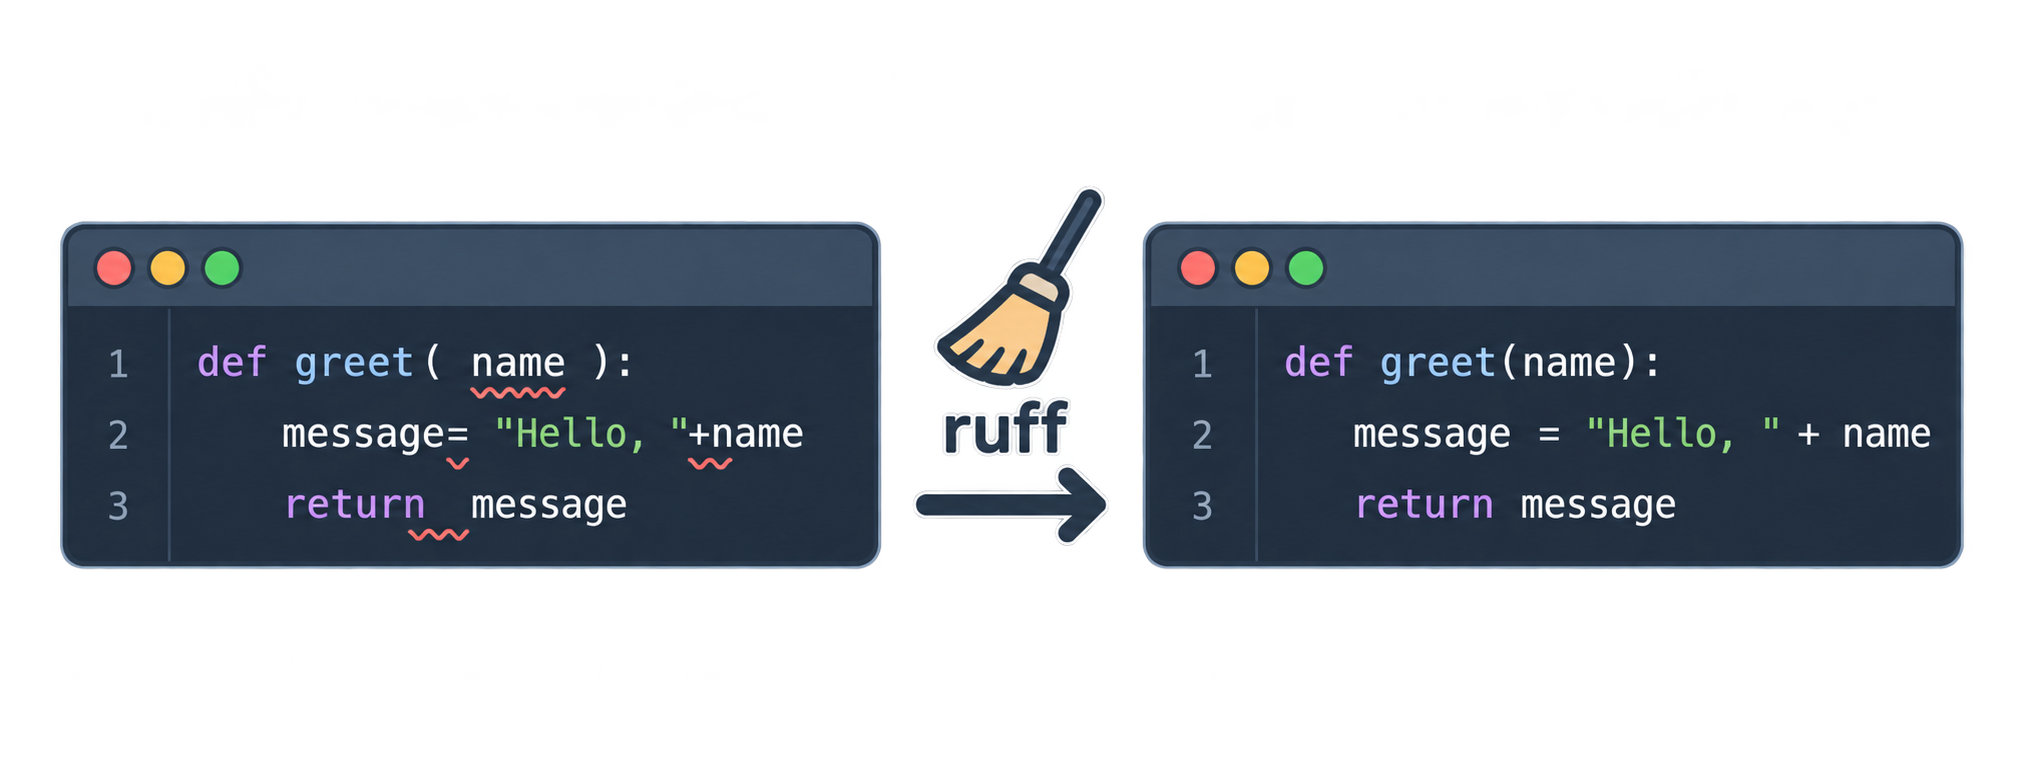
Aman's code works, but it looks like this:
import os,sys
import requests
def   get_data( url ):
    x=requests.get(url)
    unused = 42
    return x.json( )
Neha says, "This runs. But nobody wants to read it. Including you, next month."
Two tools in one
Linter: reads your code and finds problems. Unused imports, unused variables, undefined names, risky patterns. Like a spell-checker for code.
Formatter: rewrites your code so the style is consistent. Spacing, line length, quotes, blank lines. Like auto-indent, but for everything.
Ruff does both. It is written in Rust, so it is extremely fast, and it replaces older tools like flake8, isort, and black.
Why it matters
- Your code looks the same as everyone else's → easier to read
- Mistakes are caught before you run → fewer bugs
- Zero arguments about style → the tool decides
Part 5: Setting Up Ruff in VS Code
Step 1: Install the extension
In VS Code, open Extensions (Ctrl + Shift + X), search Ruff (by Astral), and install it.
Step 2: Install the package in your environment
pip install ruff
Step 3: Format on save
Open VS Code settings (Ctrl + ,), search "format on save", and tick it. Also set Ruff as the default formatter for Python. Or add this to .vscode/settings.json in your project:
{
  "[python]": {
    "editor.defaultFormatter": "charliermarsh.ruff",
    "editor.formatOnSave": true,
    "editor.codeActionsOnSave": {
      "source.fixAll.ruff": "explicit",
      "source.organizeImports.ruff": "explicit"
    }
  }
}
Now every time Aman saves, Ruff formats the file and fixes what it can.
Optional: project settings
Ruff reads settings from pyproject.toml (more on this file soon):
[tool.ruff]
line-length = 88

[tool.ruff.lint]
select = ["E", "F", "I"]   # errors, pyflakes, import sorting
Defaults are fine to start. Change them only when you need to.
Part 6: Ruff in Action
Aman saves his messy file. Ruff turns it into:
import requests


def get_data(url):
    x = requests.get(url)
    return x.json()
What happened:
import os,sys→ removed (unused)def get_data( url )→ spaces fixedx=requests.get(url)→ spaces around=unused = 42→ flagged with a warning (Ruff does not delete code that might be intentional, but it tells you)- Two blank lines before the function (Python style standard, called PEP 8)
From the terminal
ruff check .          # find problems in all files
ruff check . --fix    # fix what can be fixed automatically
ruff format .         # format all files
Reading the warnings
A typical message:
src/main.py:5:5: F841 Local variable `unused` is assigned to but never used
src/main.py→ file5:5→ line 5, column 5F841→ rule code (you can search it)- the rest → plain explanation
Hover over the squiggle in VS Code to see the same message.
Neha's rule: "Turn on format-on-save on day one. Then you never think about style again."
Practice
- Install Ruff and enable format on save. Write some badly spaced code and save it. What changed?
- What is the difference between a linter and a formatter?
- Run
ruff check .in your project. How many warnings do you get?
Part 7: Introduction to uv (Modern Package Manager)
So far, Aman uses three separate tools:
python -m venv .venv→ make an environmentsource .venv/bin/activate→ activate itpip install ...andpip freeze > requirements.txt→ manage packages
It works. But it is slow, and requirements.txt has problems: it does not separate "what I asked for" from "what got pulled in", and it is easy to forget to update.
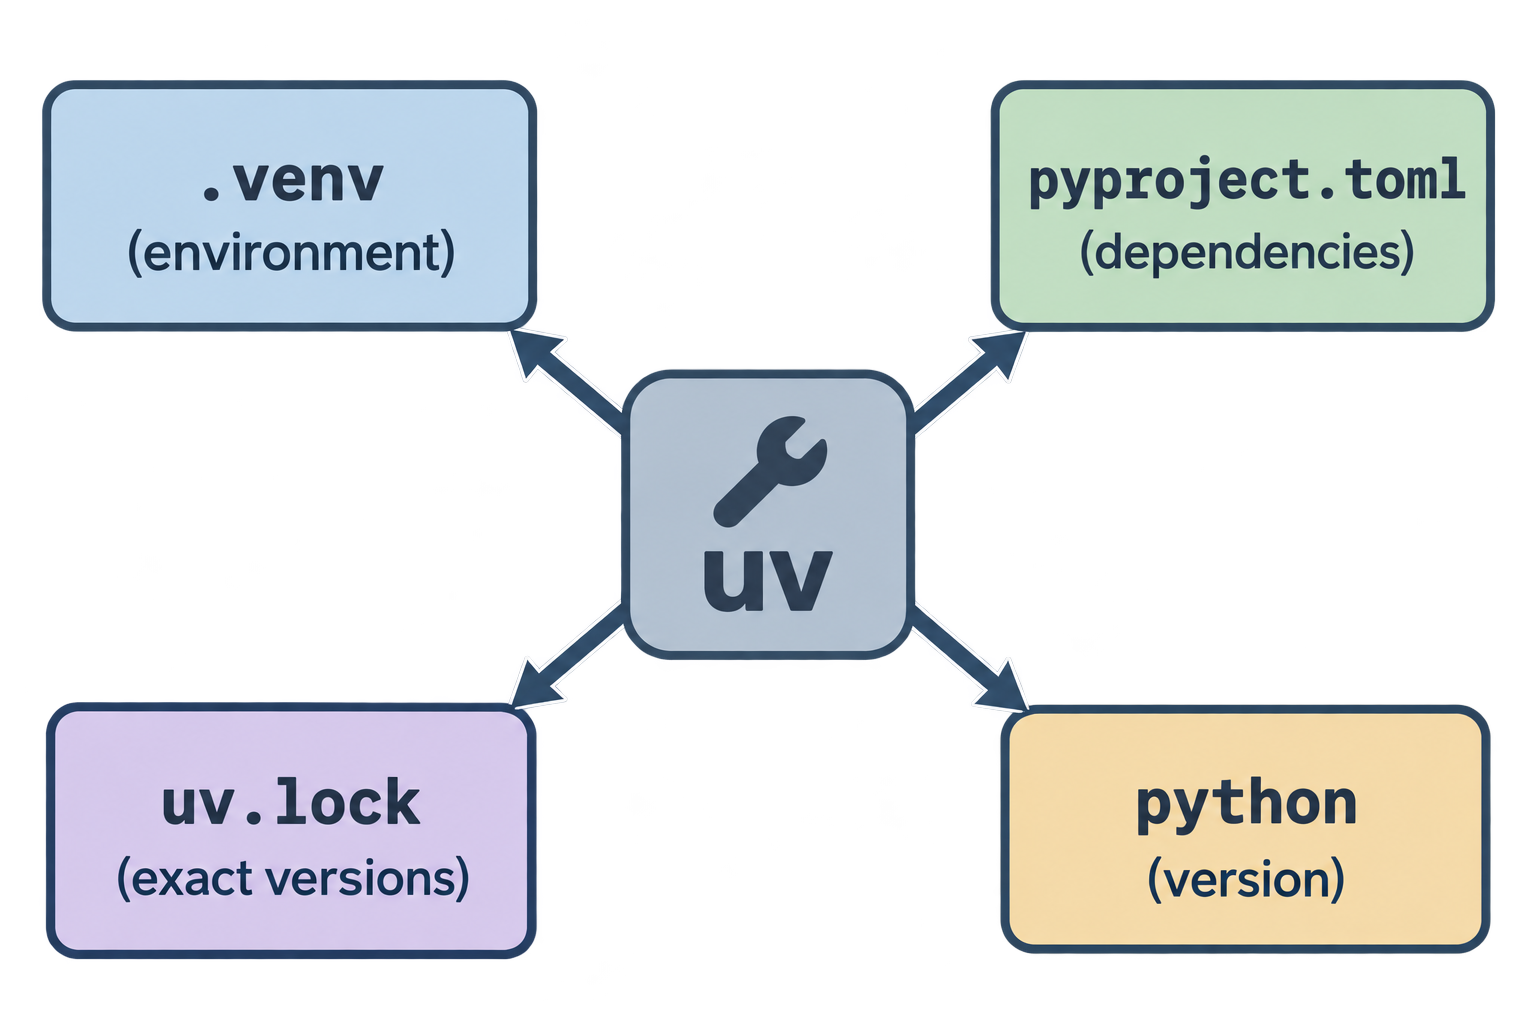
uv replaces all three tools with one. It is made by the same team as Ruff, also written in Rust, and it is 10 to 100 times faster than pip.
What uv does
- Creates the virtual environment
- Installs packages
- Tracks your dependencies in
pyproject.toml - Locks exact versions in
uv.lock - Can even install Python versions for you
Part 8: Installing uv
uv is installed once, on your computer, not inside a project.
Mac/Linux:
curl -LsSf https://astral.sh/uv/install.sh | sh
Windows (PowerShell):
powershell -ExecutionPolicy ByPass -c "irm https://astral.sh/uv/install.ps1 | iex"
Or with pip, if you prefer:
pip install uv
Check:
uv --version
Part 9: Using uv (init, add, sync)
Start a new project
uv init my-ai-app
cd my-ai-app
uv creates:
my-ai-app/
├── .gitignore
├── .python-version     ← which Python version to use
├── README.md
├── main.py
└── pyproject.toml      ← project settings and dependencies
Already have a folder? Run uv init inside it.
pyproject.toml
This file replaces requirements.txt. It describes the project:
[project]
name = "my-ai-app"
version = "0.1.0"
description = "Add your description here"
requires-python = ">=3.12"
dependencies = []
Add a package
uv add requests
uv does four things at once:
- Creates
.venvif it does not exist - Installs
requests - Writes
requestsintopyproject.tomlunderdependencies - Writes the exact version (and all sub-dependencies) into
uv.lock
dependencies = [
    "requests>=2.32.3",
]
Add several at once:
uv add pandas matplotlib python-dotenv
Remove:
uv remove matplotlib
Run code
You do not need to activate the environment:
uv run main.py
uv runs the file using the project's .venv automatically. (You can still activate it the old way if you like.)
Sync (install from the lock file)
When someone clones the project, or when you pull changes:
uv sync
This reads uv.lock and installs exactly the same versions. Everyone on the team has an identical environment.
Add dev-only tools
Ruff is a tool for you, not for the app. Add it as a dev dependency:
uv add --dev ruff
Two files, two jobs
| File | What | Who edits |
|---|---|---|
pyproject.toml |
What you want: requests>=2.32 |
You (via uv add) |
uv.lock |
Exact versions of everything | uv only. Never edit by hand. Commit it. |
Old way vs new way
| Task | pip + venv | uv |
|---|---|---|
| Create env | python -m venv .venv |
automatic |
| Activate | source .venv/bin/activate |
not needed (uv run) |
| Install | pip install requests |
uv add requests |
| Save list | pip freeze > requirements.txt |
automatic |
| Install from list | pip install -r requirements.txt |
uv sync |
| Speed | slow | very fast |
Should I still learn pip?
Yes. You will see pip and requirements.txt in thousands of tutorials and older projects. Know both. Use uv for your own new projects.
Practice
- Install uv and run
uv init test-project. List the files it created. - Run
uv add requests. Openpyproject.toml. What changed? - What is the difference between
pyproject.tomlanduv.lock? - Why do you not need to activate
.venvwithuv run?
Part 10: Complete Python Project Workflow
Neha says, "Let's do one project from zero, using everything from all five articles." Aman builds a small tool that fetches posts from an API, saves them, and prints a summary.
Step 1: Create the project
uv init post-fetcher
cd post-fetcher
code .          # open in VS Code
Step 2: Add packages
uv add requests pandas python-dotenv
uv add --dev ruff
Step 3: Set up folders
mkdir data src
Move main.py into src/.
Step 4: Secrets
Create .env:
API_BASE_URL=https://jsonplaceholder.typicode.com
Create .env.example:
API_BASE_URL=
Check that .gitignore contains .env (uv's default .gitignore usually does; add it if not).
Step 5: Config
src/config.py:
import os
from pathlib import Path
from dotenv import load_dotenv

BASE_DIR = Path(__file__).parent.parent
DATA_DIR = BASE_DIR / "data"

load_dotenv(BASE_DIR / ".env")

API_BASE_URL = os.environ["API_BASE_URL"]
Step 6: API module
src/api.py:
import requests

from config import API_BASE_URL


def get_posts() -> list[dict]:
    try:
        response = requests.get(f"{API_BASE_URL}/posts", timeout=10)
        response.raise_for_status()
        return response.json()
    except requests.exceptions.RequestException as e:
        print("API call failed:", e)
        return []
Step 7: Data module
src/data.py:
import pandas as pd

from config import DATA_DIR


def to_dataframe(records: list[dict]) -> pd.DataFrame:
    return pd.DataFrame(records)


def save(df: pd.DataFrame, name: str) -> None:
    DATA_DIR.mkdir(exist_ok=True)
    df.to_csv(DATA_DIR / name, index=False)


def summary(df: pd.DataFrame) -> str:
    counts = df["userId"].value_counts()
    return f"{len(df)} posts from {len(counts)} users. Top user: {counts.idxmax()}"
Step 8: Main
src/main.py:
from api import get_posts
from data import save, summary, to_dataframe


def main() -> None:
    posts = get_posts()
    if not posts:
        print("No data. Exiting.")
        return

    df = to_dataframe(posts)
    save(df, "posts.csv")
    print(summary(df))


if __name__ == "__main__":
    main()
Step 9: Run
uv run src/main.py
Output:
100 posts from 10 users. Top user: 1
And data/posts.csv now exists.
Step 10: Clean
uv run ruff check . --fix
uv run ruff format .
Final folder
post-fetcher/
├── .venv/
├── data/
│   └── posts.csv
├── src/
│   ├── main.py
│   ├── config.py
│   ├── api.py
│   └── data.py
├── .env               ← private
├── .env.example       ← shared
├── .gitignore
├── .python-version
├── pyproject.toml
├── uv.lock
└── README.md
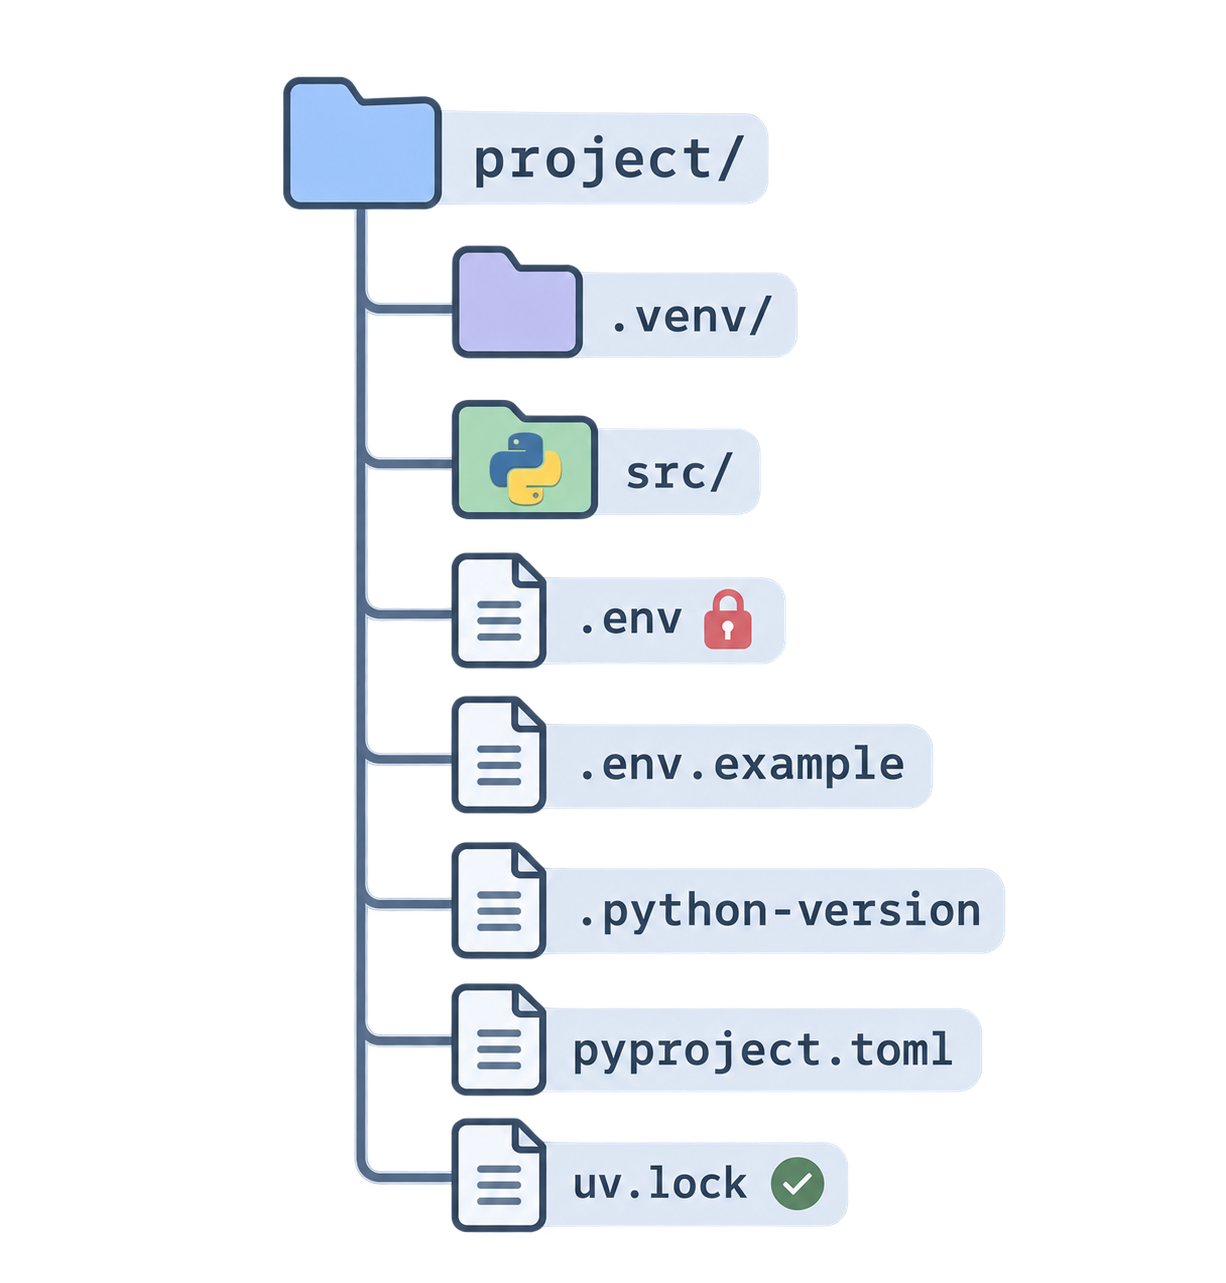
The checklist for every new project
uv initthe projectuv addthe packages you need,--devfor toolsdata/andsrc/folders.envfor secrets,.env.examplefor the template,.envin.gitignoreconfig.pyfor paths and secrets- One module per responsibility; short
main.pywithif __name__ == "__main__": try/exceptaround anything that can fail- Ruff on save
uv run src/main.py
Practice (Workflow)
- Build the
post-fetcherproject above from scratch. - Change it to fetch
/usersinstead of/postsand print how many users have an email ending in.biz. - Delete
.venvand runuv sync. Does the project still work? - Share the project with a friend (without
.env). What do they need to do to run it?
Part 11: Final Quiz
Try without looking back. Answers at the end.
Q1. Why should an API key never be written directly in a .py file?
Q2. Which file holds secrets, and which file is a shared template?
Q3. What does load_dotenv() do?
Q4. What is the difference between a linter and a formatter?
Q5. What are the two Ruff terminal commands for finding problems and for formatting?
Q6. What does uv add requests change?
Q7. What does uv sync do?
Q8. Which file should you never edit by hand: pyproject.toml or uv.lock?
Q9. How do you run a script with uv without activating the environment?
Q10. Put these in the correct order for a new project: uv add, write .env, uv init, uv run, create src/.
Answers
Part 2:
- Done in your editor.
- Add a line
.envto.gitignore. - So others know which secrets they need, without seeing your real values.
- Anyone who sees the file (friend, GitHub, screenshot) can use your key and spend your money.
Part 3:
load_dotenv()thenprint(os.getenv("NAME"))→AmanNoneos.getenvreturnsNoneif missing;os.environ[...]raisesKeyError.port = int(os.getenv("PORT", "8000"))
Part 6:
- Spacing, blank lines, and import order were fixed; unused imports removed.
- A linter finds problems (unused variables, errors). A formatter fixes style (spacing, line length).
- Your own number.
Part 9:
.gitignore,.python-version,README.md,main.py,pyproject.tomlrequestsappears underdependencies, anduv.lockplus.venvwere created.pyproject.tomllists what you asked for (loose versions).uv.locklists exact versions of everything, for reproducibility.uv runfinds the project's.venvautomatically and uses it.
Part 10 (Workflow):
- Done in your editor.
- Change the URL to
/users, then:df["email"].str.endswith(".biz").sum() - Yes.
uv syncrebuilds.venvfromuv.lock. - Run
uv sync, copy.env.exampleto.env, fill in the values, thenuv run src/main.py.
Final Quiz:
- Code gets shared and uploaded. A key in code becomes public and can be abused.
.envholds secrets (private)..env.exampleis the template (shared).- Reads the
.envfile and loads its values as environment variables soos.getenv()can read them. - Linter finds problems; formatter fixes style.
ruff check .andruff format .- Installs
requestsinto.venv, adds it topyproject.toml, and records exact versions inuv.lock. - Installs everything from
uv.lockso the environment matches exactly. uv.lockuv run script.pyuv init→ createsrc/→uv add→ write.env→uv run
Epilogue
Aman revokes the leaked key, creates a new one, and puts it in .env. He never types a secret into code again.
His projects now start with uv init, format themselves on save, and run with one command. When Neha clones his repository, uv sync gives her an identical environment in seconds.
"You started five articles ago with print("Hello, world!")," Neha says. "Now you have the workflow of a professional Python developer. Everything after this — AI agents, APIs, data pipelines — is built on exactly this foundation."
Aman opens a new terminal and types:
uv init my-first-ai-agent
The real work begins.
Comments
Join the discussionNo comments yet. Be the first to comment.